
This document describes Citrix App layering technology, covering how it works and how it integrates with XenApp and XenDesktop environments, as well as alternative virtualization systems. Citrix App Layering’s main purpose is to make managing Windows applications easier with a single interface. It enables administrators to design and maintain enterprise apps regardless of the hypervisors or cloud architecture they are using. The operating system and apps are divided into manageable chunks.
Citrix App Layering manages the layers with a single virtual appliance before passing them on to other platforms for image and application deployment. This will be explored in detail in four parts in this article.
- Operating System Layer
- Platform Layer
- Application Layer
- Publishing Application
1. OPERATING SYSTEM LAYER
The Operating System Layer consists solely of the basic operating system (along with patches) and VMware Tools. Platform and Application Layers are often where other components are deployed. For any Windows OS, only one OS layer is required. If you support both a Windows desktop OS and a Windows Server OS, for example, establish a separate OS layer for each. The OS layer you use is required by the platform and app layers you create.
When one of the OS layers is updated, the platform and app layers developed with that OS continue to run. Ideally, you should develop a single generic OS layer and use it in all of your layered graphics. Because App and Platform layers only interact with the OS layer that created them, layer maintenance is kept to a minimum. If you need to support both a desktop and a server operating system, this is the way to go. You only need to run Windows Updates on the OS Layer if you install.NET Frameworks in the OS Layer. Office, on the other hand, should always be installed as an Application Layer.
• An OS Layer is used to generate the other layers (Platform and Application). These layers are tied to a single OS layer and can’t be utilized on any other. You might have to recreate the Platform Layer if you upgrade the hypervisor tools in the OS Layer.
1. Before creating the OS Layer, ensure the server has NOT been joined to a domain

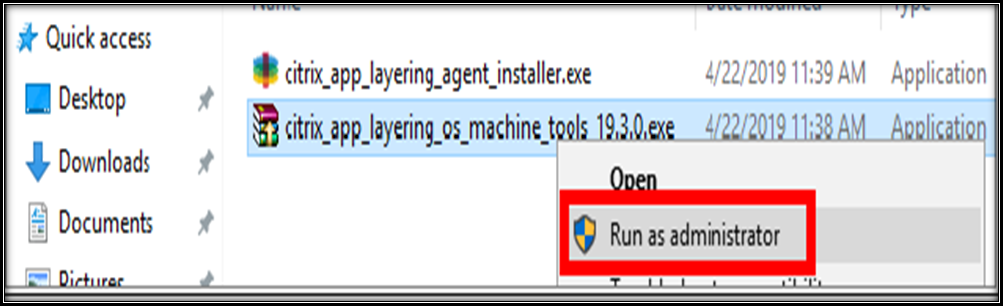
2. You can download citrix app layer machine tools from https://www.citrix.com/downloads and install the Citrix App Layering 2102 OS Machine Tools
3. The Citrix Optimizer is a Windows application that assists Citrix administrators in optimizing several components of their environment, most notably the operating system with Virtual Delivery Agent (VDA). The program is built on PowerShell, but it also has a graphical user interface.
Citrix Optimizer has three modes of operation:
• Analyze – compare the present system to a template and highlight any differences.
• Execute (available only in PowerShell mode) – apply the template’s optimizations
• Rollback (available only in PowerShell mode) – revert the previously applied optimization adjustments
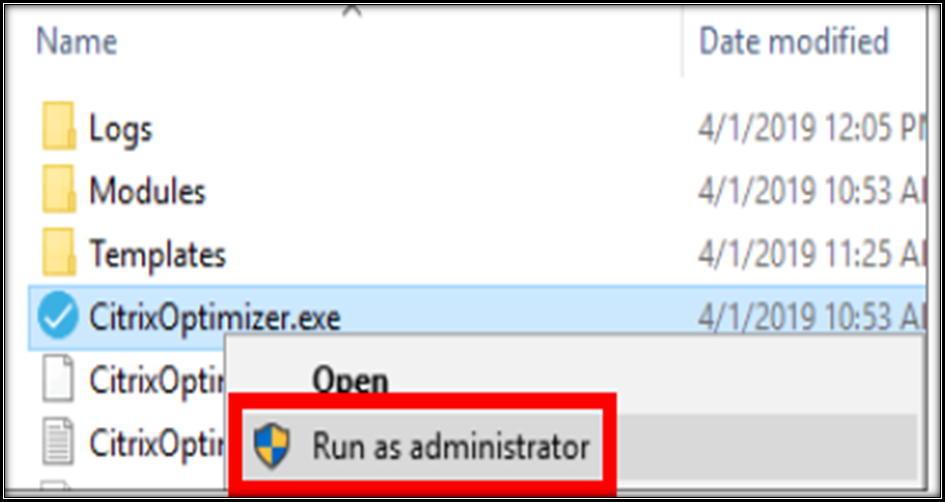
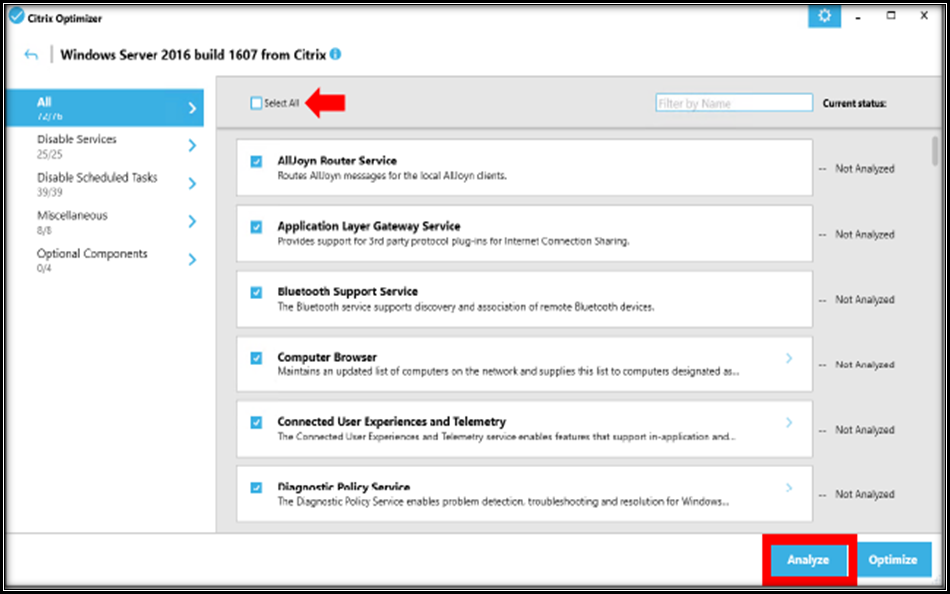
Right click on Citrix optimizer and “Run as administrator.” disable the unused services using the Citrix optimizer tool.
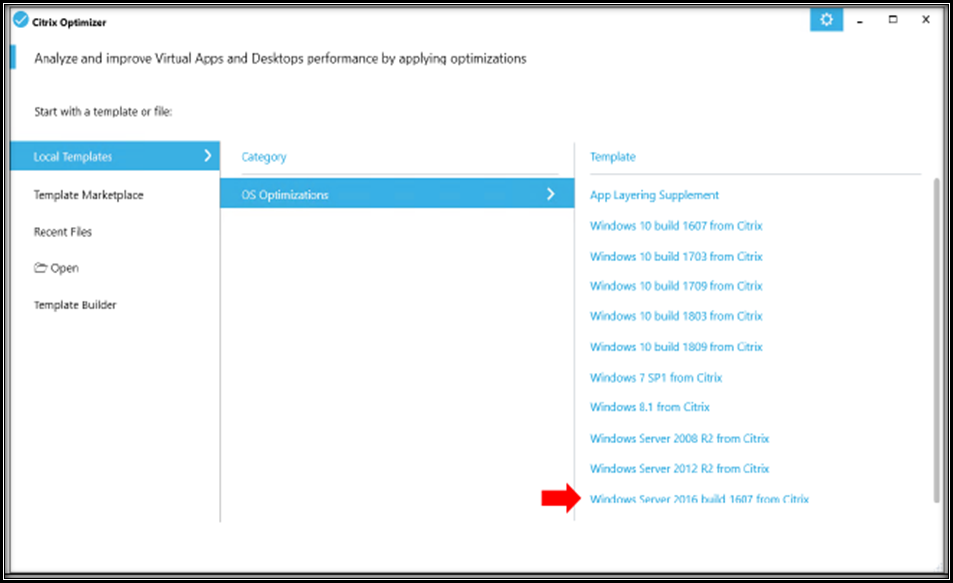
4. In the Citrix optimizer tool, click on windows server 2016, as shown on the example below,
5. Click the checkbox for “ Select all “ then click “ Analyse” as shown in the example below,
6. When the analysis has completed, click on optimize.
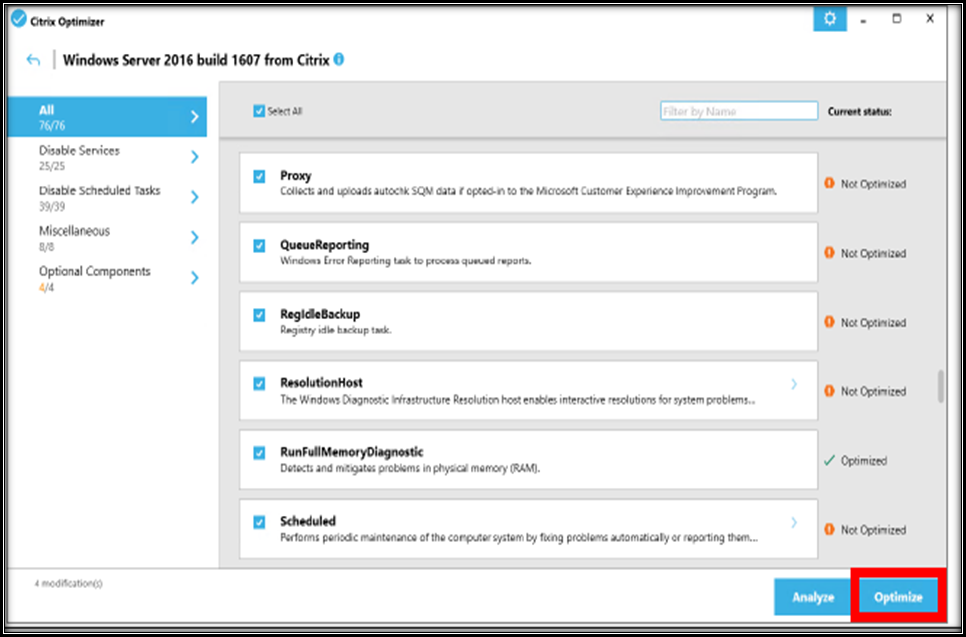
7. When optimization has completed, Switch back to main console as shown below.
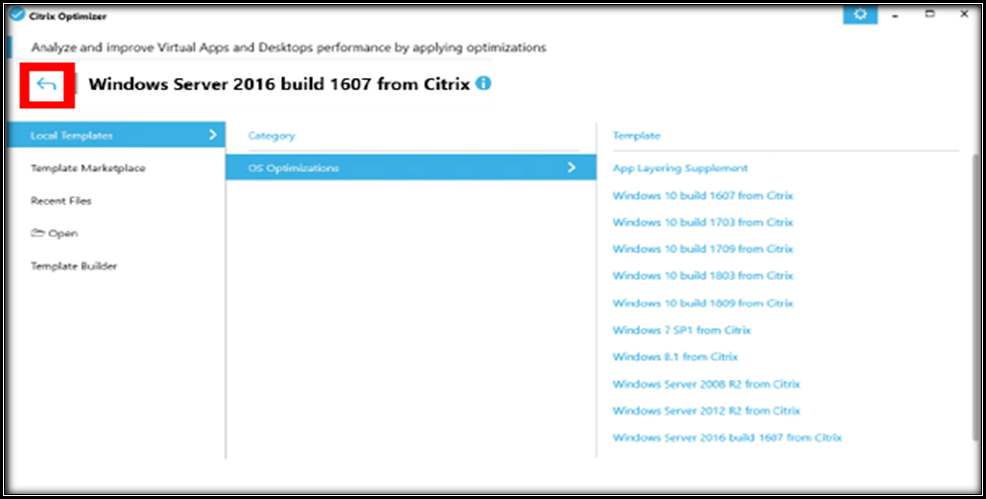
8. In the right-hand template panel, select App Layering Supplement.
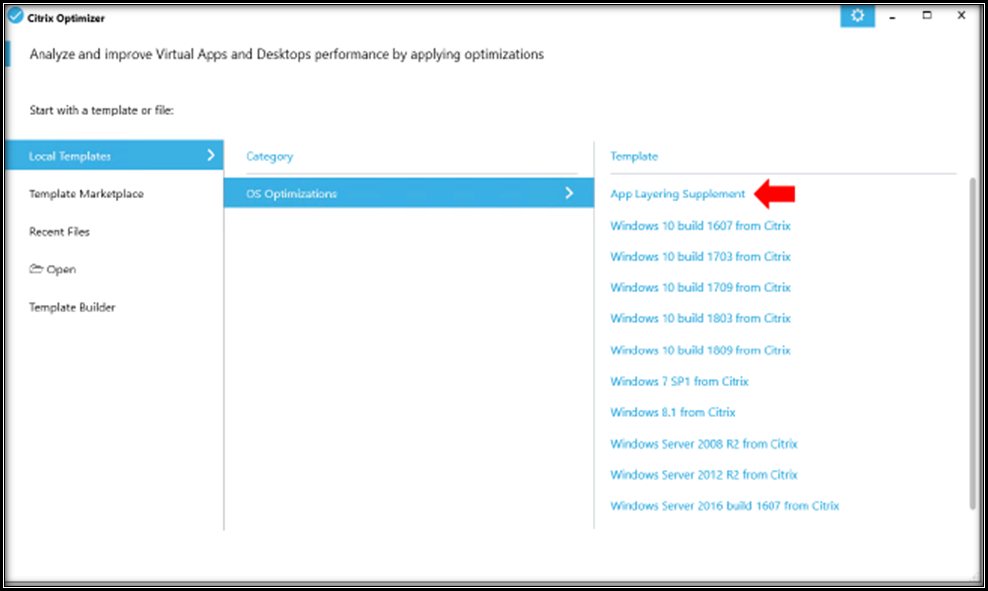
9. Choose the “Select All” check box, then say Analyze.
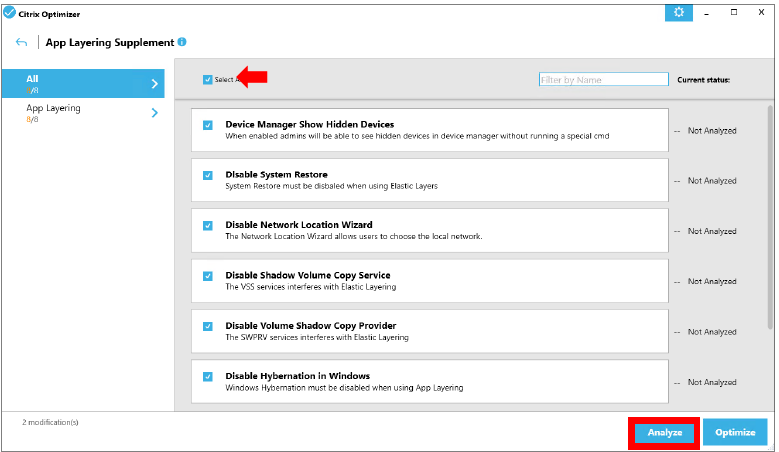
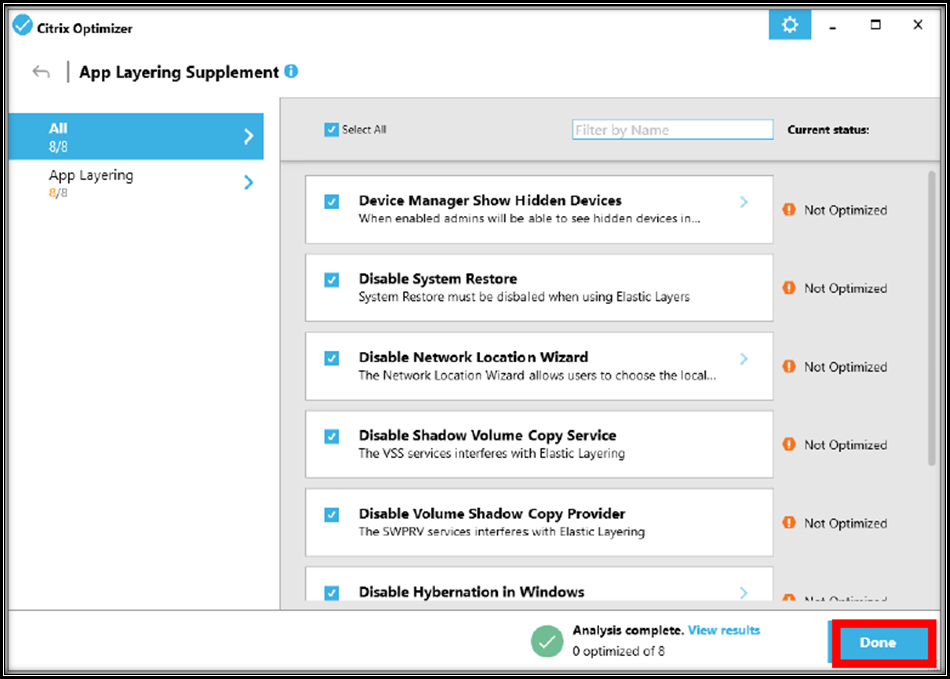
10. The completed analyses will show most or all the settings as “not optimized”. Click on done
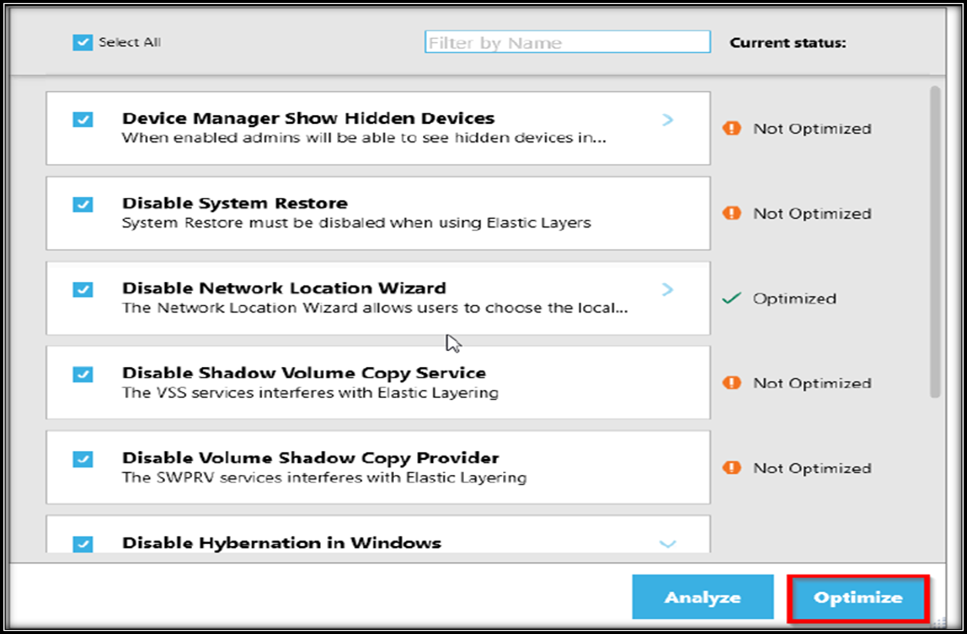
11. Click on optimize,
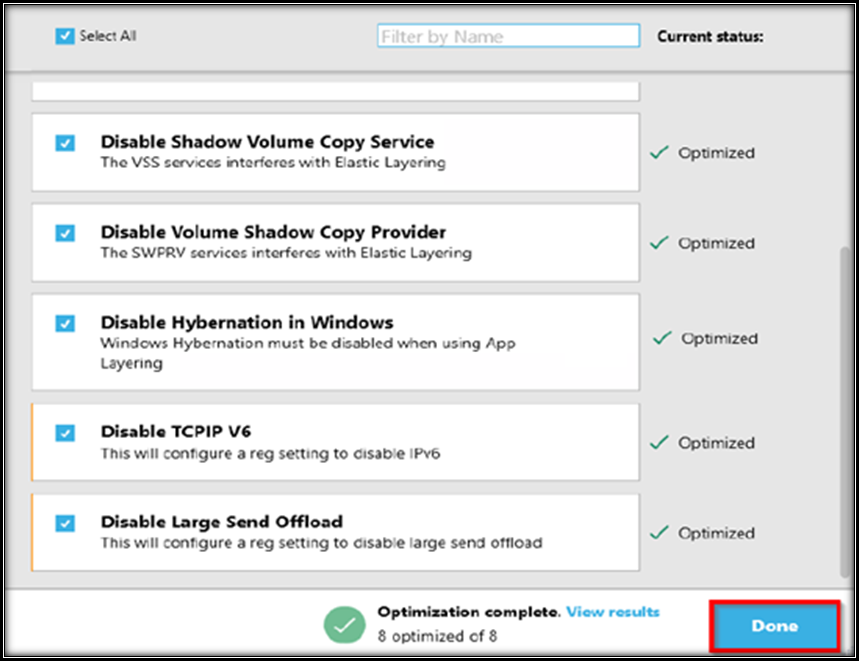
12. Once the optimization is completed, click on done button.
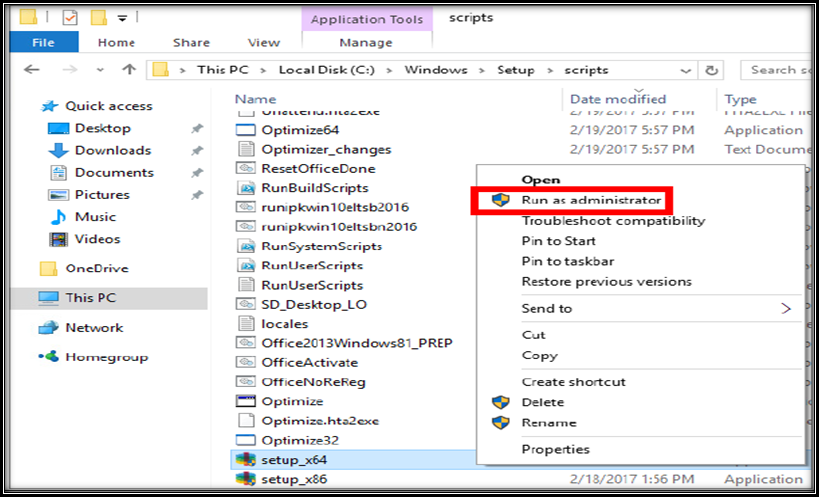
13. Using File Explorer, navigate to: C:\Windows\Setup\Scripts, and scroll down to setup_x64.exe, right-click and select Run as administrator.
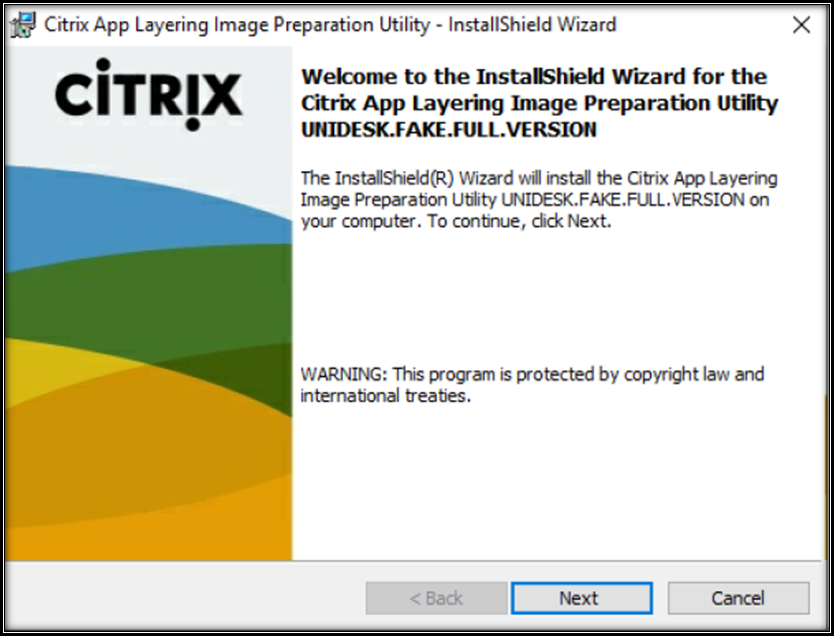
14. On the Citrix App Layering Image Preparation Utility window, click next.
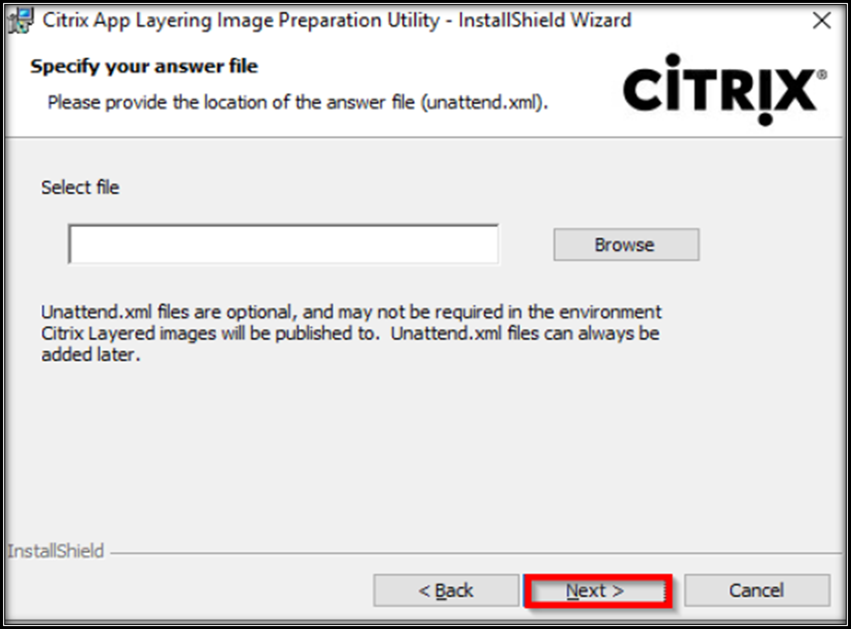
15. On Specify your answer file page, leave the defaults and click Next.
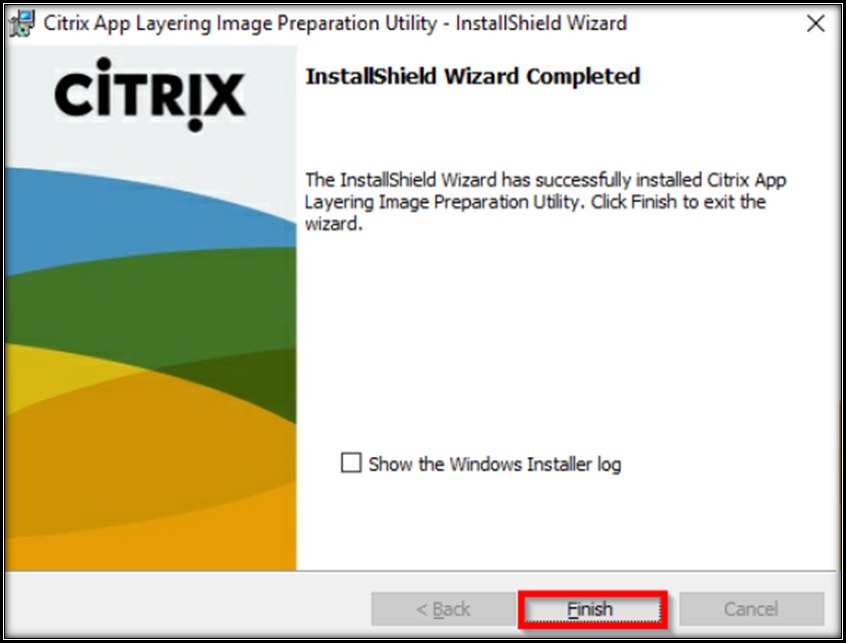
16. Click Finish to exit the installer
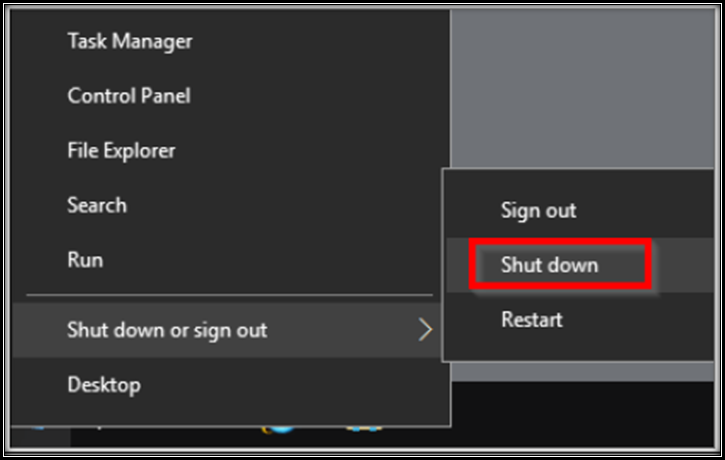
17. Shutdown the host,
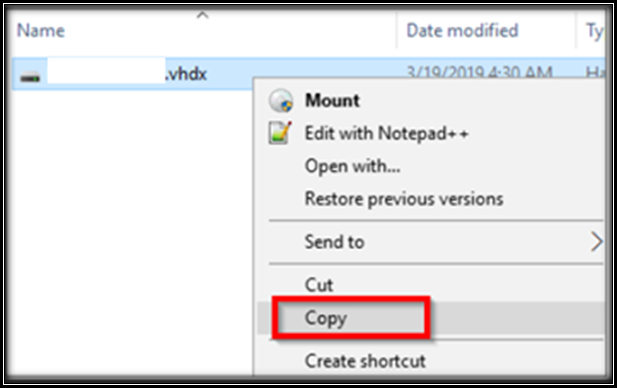
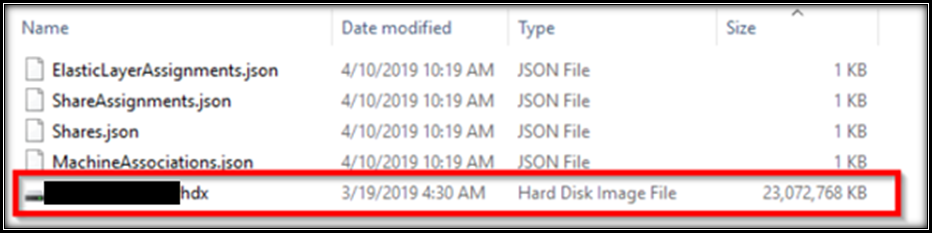
18. Copy the VHDX file from the hypervisor storage and paste to the app layering share. (Right-click on vhdx hard disk image file and select Copy)
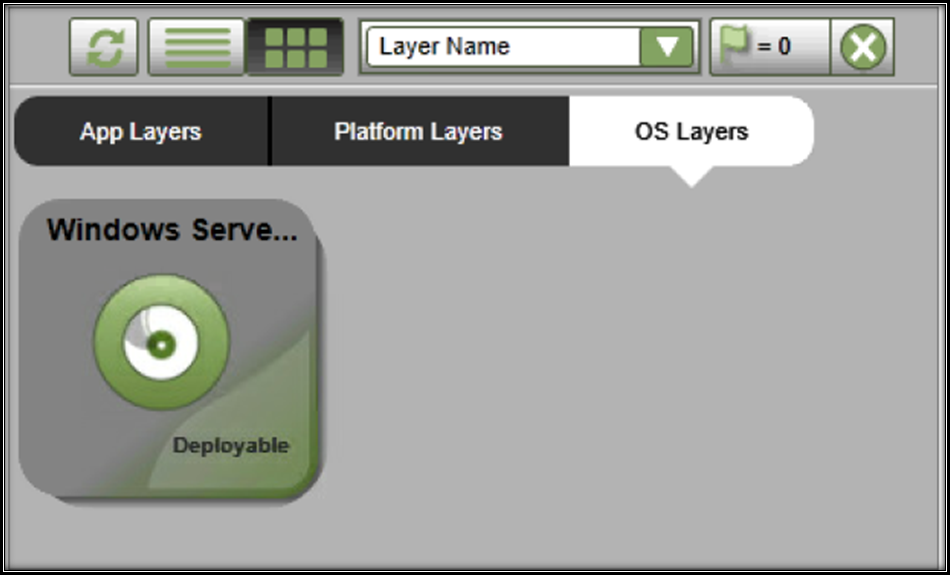
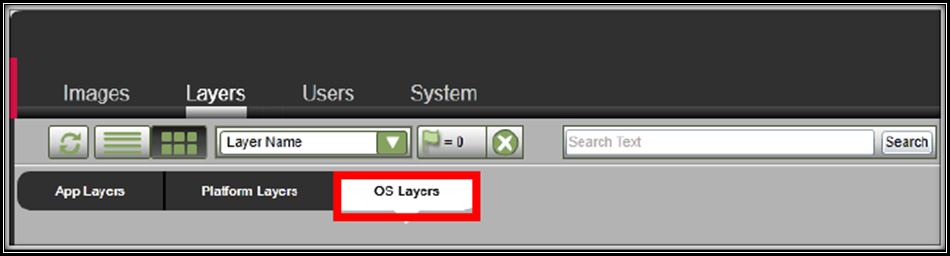
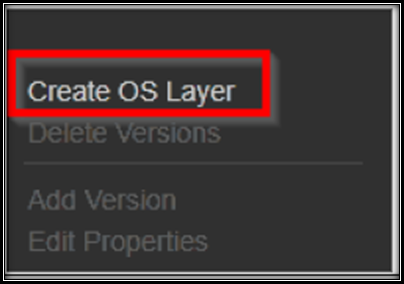
19. Navigate to the app layering console and create the OS Layer. (In the App Layering console, select the Layers menu on the top left and then select the OS Layers tab.)
20. Click on create OS Layer as shown below,
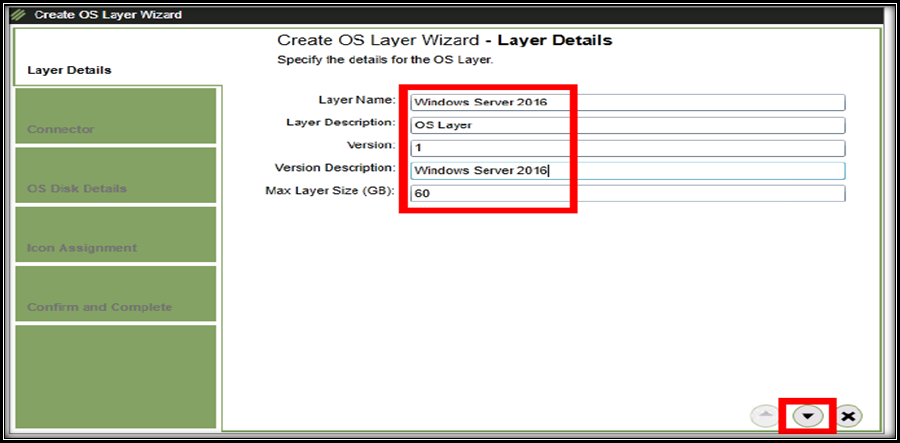
21. Provide the layer details as shown on below,
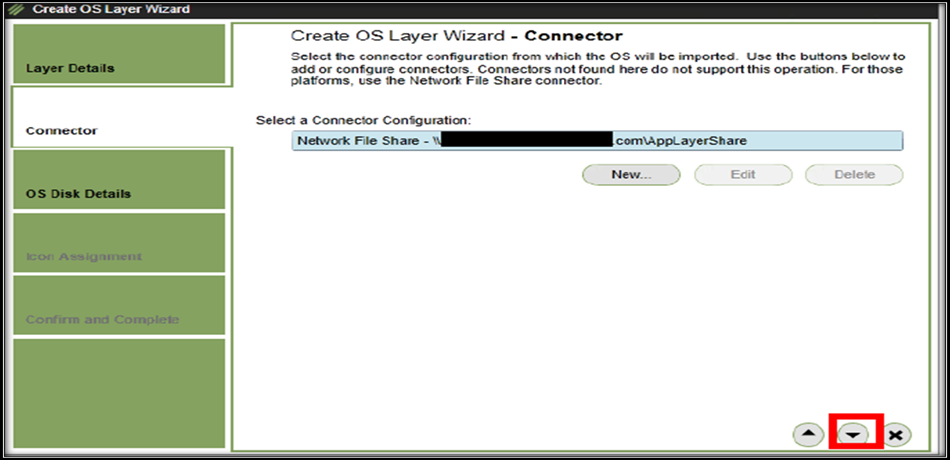
22. On the connector details page in the create OS Layer Wizard, leave the defaults and click the down arrow to continue.
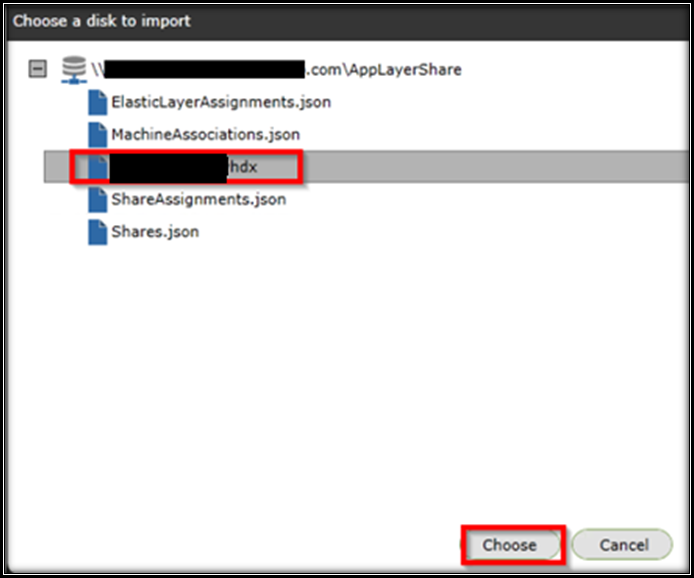
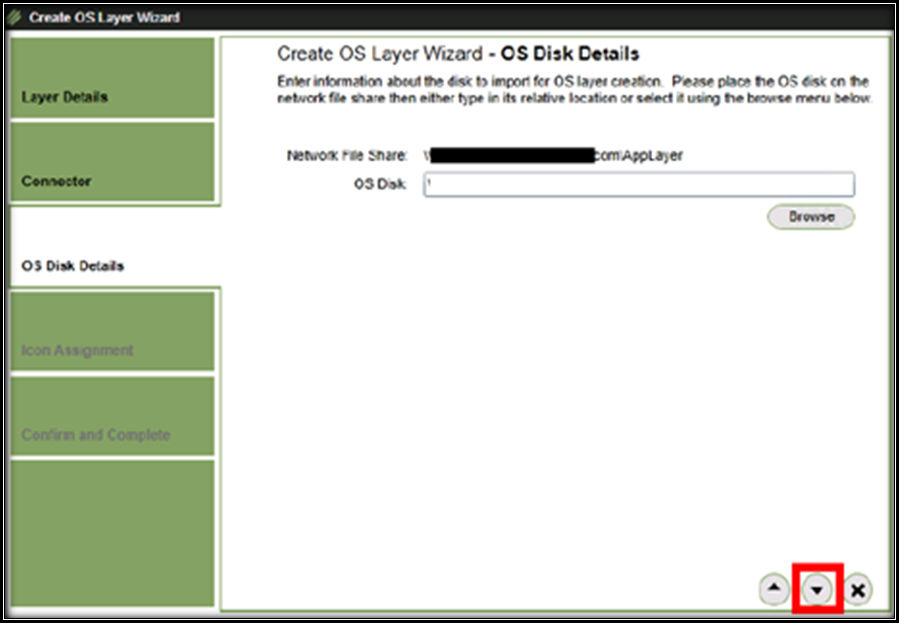
23. On the OS disk details page on the create OS layer wizard, click on browse. In the choose a disk to import dialog box, expand the location by clicking on the + icon and select .vhdx. Click choose.
24. Verify the OS Disk:
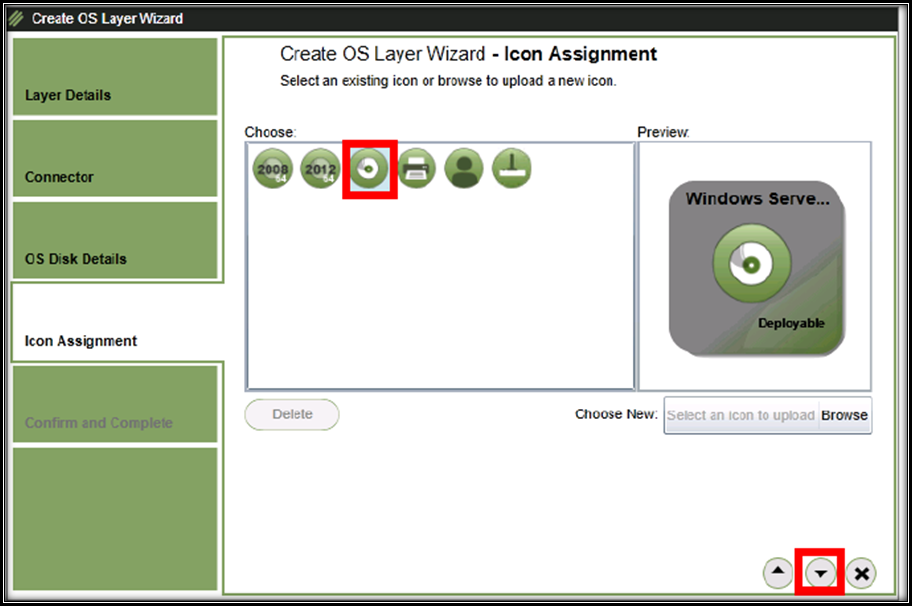
25. On the Icon assignment page, select the disk icon and click the Down Arrow to continue.
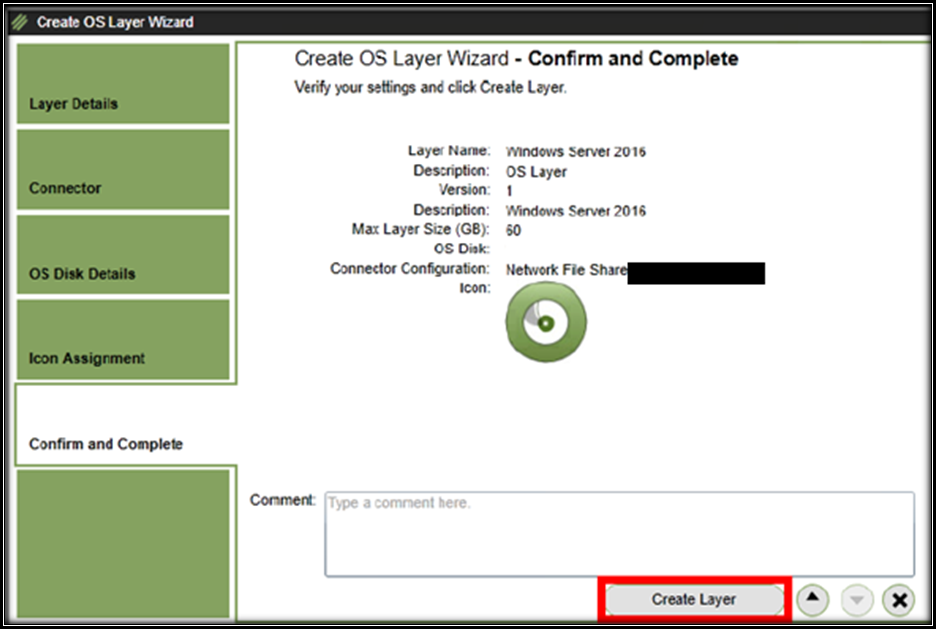
26. Click on the confirm and complete page, click on create layer.
27. Validate the task progress. On the task section at the bottom of the window, click the Up Arrow to pull up the event viewer.
28. Click the information icon next to the running task, or double-click anywhere in the task line for more details.
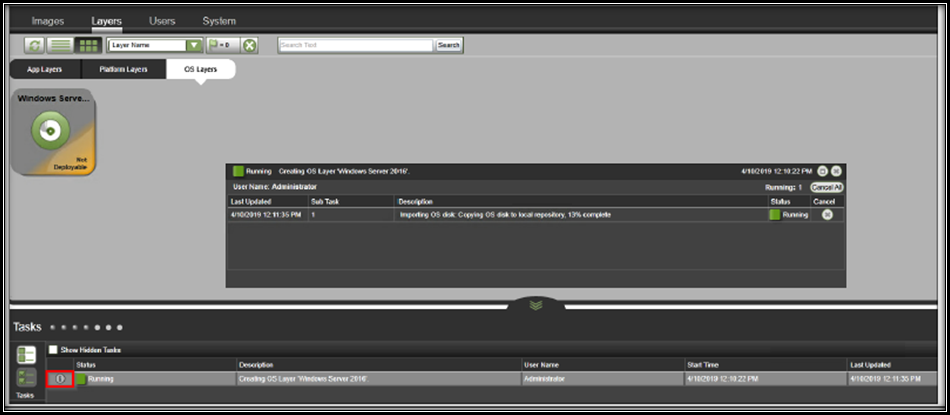
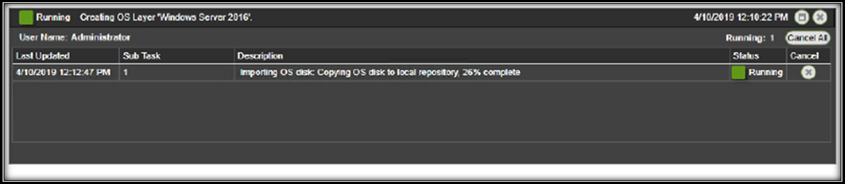
29. Monitor the task progress and wait for it to complete.
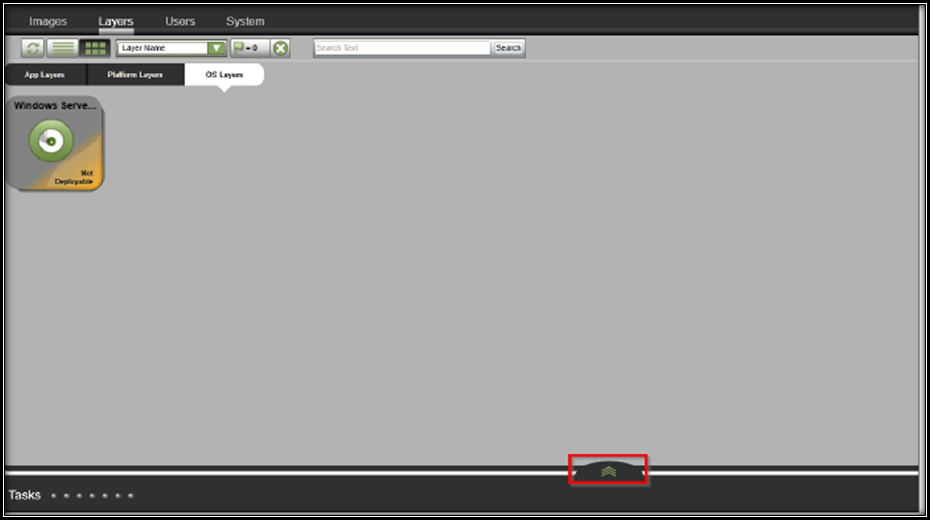
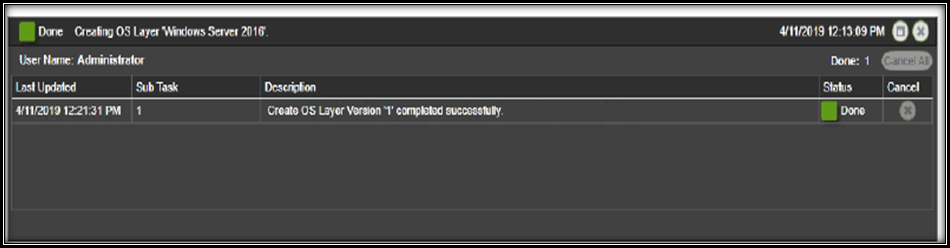
30. Validate the status changes to done, after the OS disk is imported. Click X to close the task details pane.
31. Verify that the Windows Server icon is now labelled as Deployable.