
Table of Contents
Pre-requisites – Systrack Master Server. 4
Pre-requisites – Systrack Web Services. 4
Pre-requisites – Systrack Administrative Tools. 4
Pre-requisites – Systrack Administrative Tools. 4
Pre-requisites – Systrack Database Preparation. 4
Pre-requisites – Systrack Anti-Virus Exclusions. 5
2.3 Build the Systrack Server – SQL Server Reporting Services Installation. 5
2.4 Build the Systrack Server – Server installation. 5
2.5 Build the Provisioning Server – License Setup. 12
2.6 Build the Provisioning Server – Deploy Tool Configuration. 13
2.7 Build the Provisioning Server – Configure Tree Uplink And Deployment Credentials. 18
2.8 Systrack Agent Deployment – Pooled Model 24
2.9 Virtual Infrastructure Integration. 27
1. Introduction
2. Build Guide
For this Build Guide the following documents are referenced:
| Document name | Author | Type |
| Deployment Guide | Lakeside Software | DG |
| Uplink Methods | Lakeside Software | Regional-Local Masters |
| Licensing Model | Lakeside Software | License Config |
| Agent Installation – Non Persistent | Lakeside Software | Pooled Agent Deployment |
Following pre-requisites have to be in place before deployment.
Pre-requisites – Systrack Master Server
- Static IP or an DNS reservation.
- Microsoft .NET Framework 4.6.1
- Microsoft Visual C++ 2017 (x86) Redistributable
- Microsoft Visual C++ 2017 (x64) Redistributable
- Microsoft SQL Server 2012 Native Client
Pre-requisites – Systrack Web Services
- Microsoft .NET Framework 4.6.1
- Microsoft Access Database Engine 2010 (x64)
- Microsoft Visual C++ 2017 (x64) Redistributable
- Microsoft URL Rewrite Module 2.0 for IIS7 (x64)
- Cannot have any IIS applications installed
Pre-requisites – Systrack Administrative Tools
- Microsoft .NET Framework 4.6.1
- IE 6.0 or above
Pre-requisites – Systrack Administrative Tools
- Microsoft Visual C++ 2017 (x86) Redistributable
- Microsoft Visual C++ 2017 (x64) Redistributable
Pre-requisites – Systrack Database Preparation
- Database Hardware should be configured and communicating on the network.
- As a best practice we recommend you only use the included SQL Express for SysTrack installations that have fewer than 1500 non-load balanced users. If the database load becomes too great, you may have to switch to a different edition of SQL Server in the future.
Pre-requisites – Systrack Anti-Virus Exclusions
- File and Print Sharing should be enabled on the target child systems along with Remote Registry Service.
- The Windows client firewall should be disabled for the deployment or an exception created to allow traffic on port 57632. If there is a network firewall, IP addresses need to be routable and allow TCP and UDP traffic on port 57632.
- Open Reporting Services Configuration Manager > Report Manager URL > Click on the URL. In the top right, click Site Settings > Security and add the newly created user, with the System Administrator role.
- Click on Home and select Folder Settings. Add the newly created user and give it all of the roles. Save the changes.
- Within SSRS browse to the Server > Analyze Reports > DataSources > Click on the datasource > Enter the new credentials and verify the test is successful
- Within the Deployment Tool click the … next to the Database name and enter the new credentials in the Reporting tab. Verify the test passes.
- You should now be able to execute reports
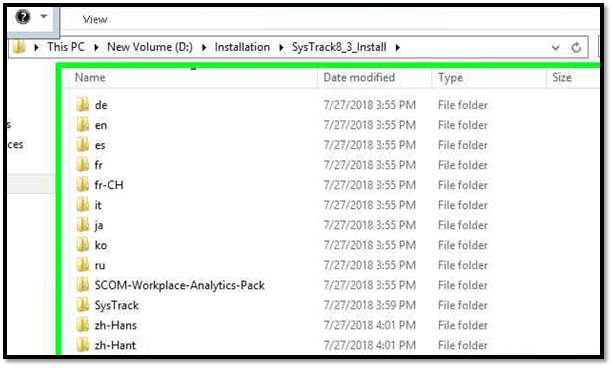
- Download the Systrack software and Extract the content.
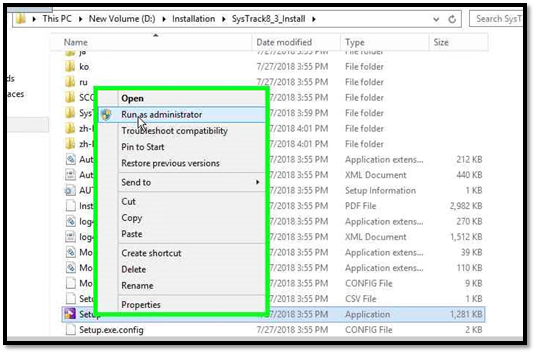
2. Now Right click on the Setup.exe and execute the setup.
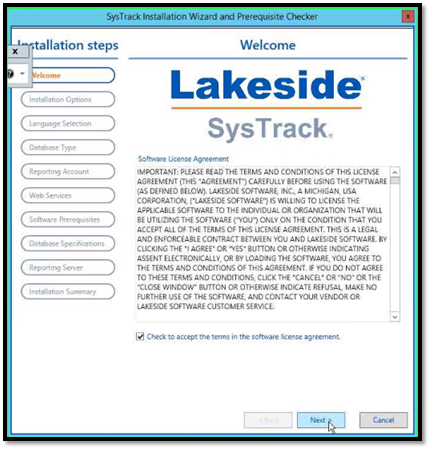
3. On the Welcome page of SysTrack Installation Wizard and Prerequisite Checker, check mark the License agreement and click on Next.
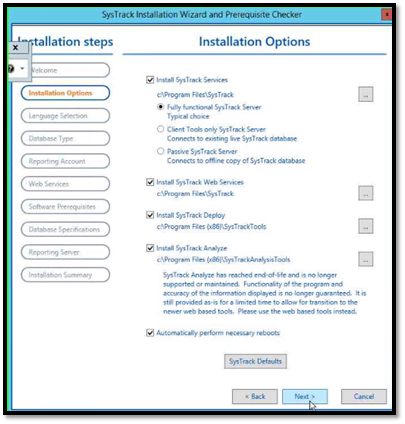
4. Now select all of components and Click Next.
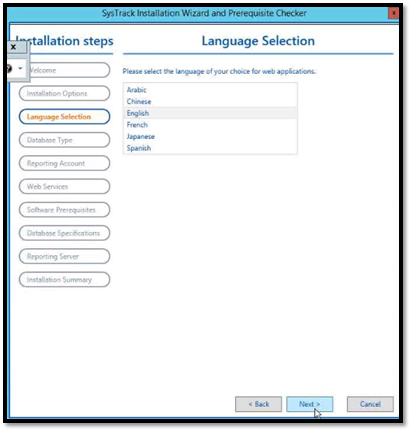
5. Now Select the Language and click next.
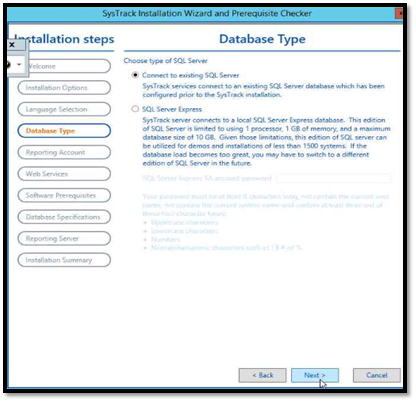
6. Click on Connect to existing SQL Server option and click on next.
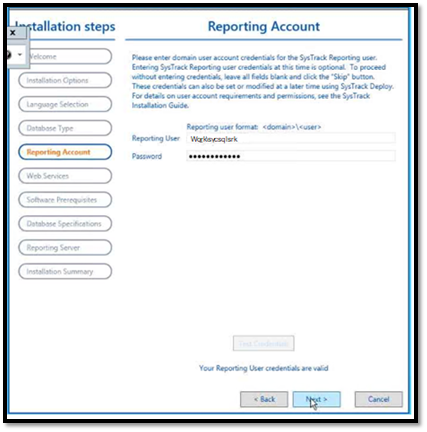
7. On the Reporting Account Page Submit the Service account credentials and Click Next.
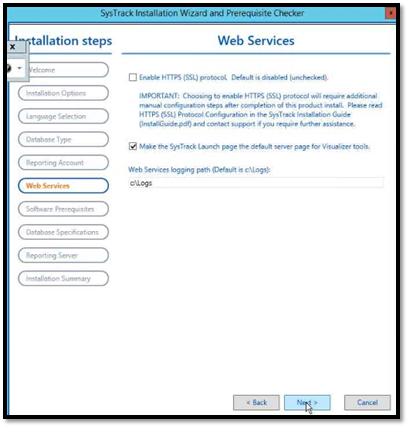
8. Set C:\Logs as default Web and SysTrack Visualizer Tools log path and click on next.
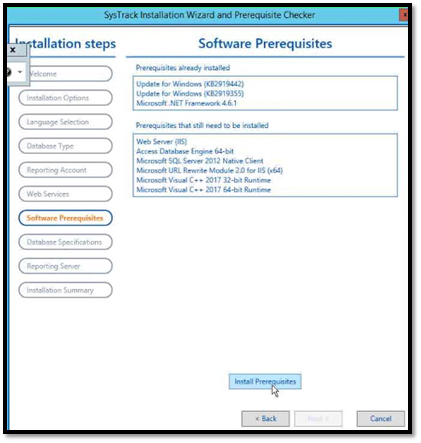
9. Click on the Install Prerequisites, It will install all the dependency software on it.
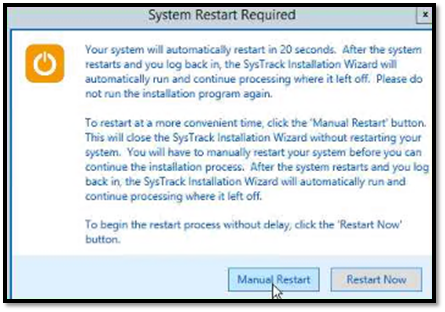
10. On the System Start Required Page click on the Manual Restart, will do the restart later.
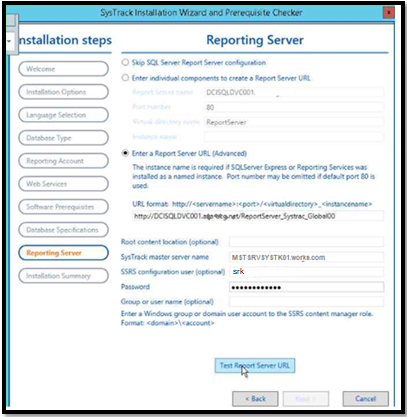
11. Post restart; SysTrack will resume installation from where previous stage and ask for Database configuration.
- Database Server: DCISQLDVC001
- Master Instance: Systrac_Global00
- Region Instance: Systrac_Region01
Chose Appropriate Server and Database Instance:
- Master Server: MSTSRVSYSTK01
- Regional Server: REGSRVSYSTK02
- On the master system, close the Deployment Tool
- Browse to HKEY_CURRENT_USER\Software\VB and VBA Program Settings\SysTrack\Deploy\.
- Look for a ‘Support’ value. If it is there, set its value to ‘1’. If the key is not there, right click and create a String value called ‘Support’. Then double click on ‘Support’ and assign a value of ‘1’.
- Re-open Deployment Tool and when prompted to enter new database credentials, click Yes
- Change the above key back to 0
Enter the new database details with relevant credentials and it should now connect
12. On the final Installation summary; click on Process selections. It will initiate Systrack Server the installation
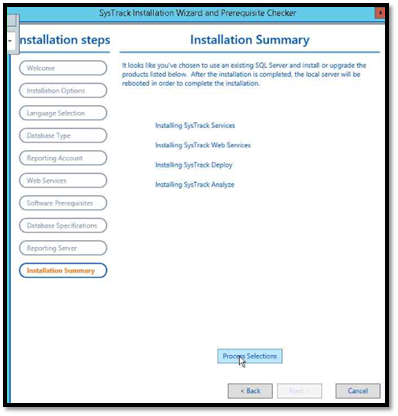
13. Click on Restart when ready to start.
2.5 Build the Provisioning Server – License Setup
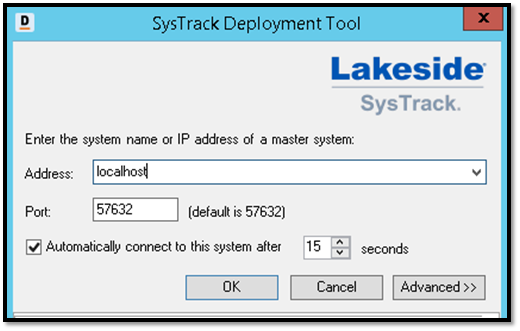
- Once newly Systrack installed server has been rebooted; launch Deploy Tool from Start menu program list
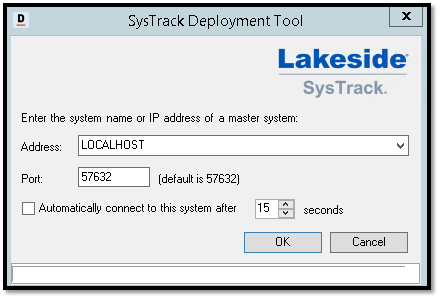
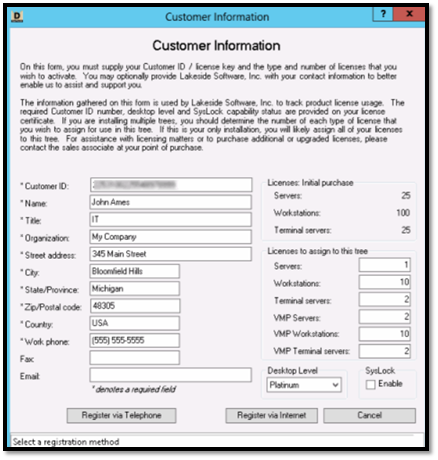
2. Now it will prompt for licenses information enter the values and click next:
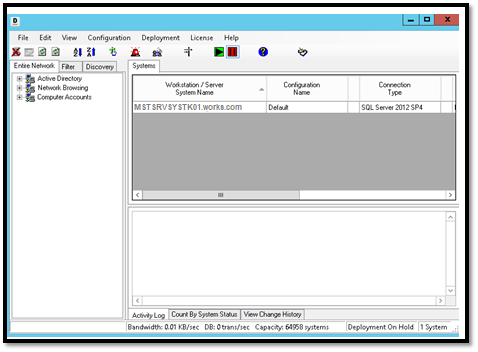
3. Systrack Deploymnet Tool Window will appear on screen after license activation.
2.6 Build the Provisioning Server – Deploy Tool Configuration
- Launch Deploy Tool from Start menu program list

2. Systrack Deployment Tool Window will appear on screen.

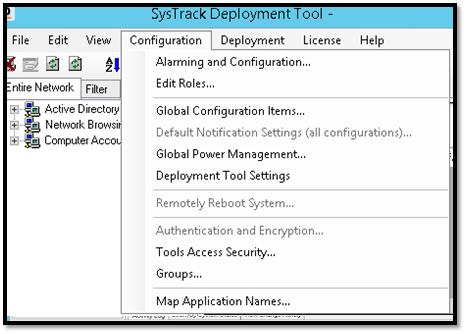
3. Click on Configuration Menu and select “Alarming and Configuration”
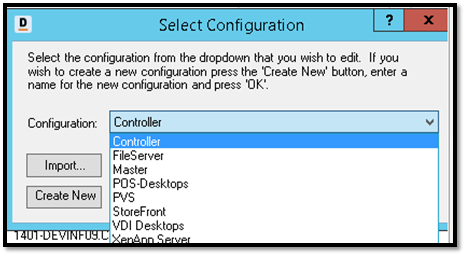
4. Import following list of configuration templates from
D:\Installation\Config\Alarms
- Controller.adtg
- FileServer.adtg
- Master.adtg
- POS-Desktops.adtg
- PVS.adtg
- StoreFront.adtg
- VDI Desktops.adtg
- XenApp Server.adtg
Verify the list once imported
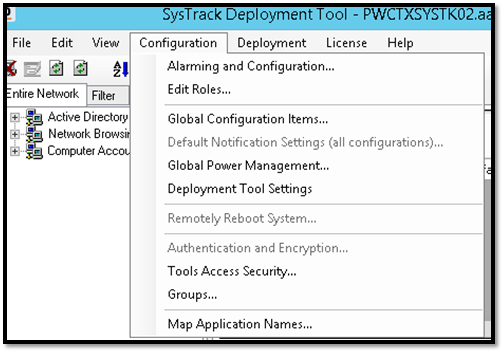
5. Click on Configuration Menu and select “Edit Roles”
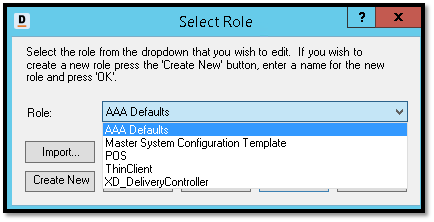
6. Import following list of configuration templtes from
D:\Installation\Config\Roles
- AAA Defaults.adtg
- Master System Configuration Template.adtg
- POS.adtg
- ThinClient.adtg
- XD_DeliveryController.adtg
Verify the list once imported
7. Click on Configuration Menu and select “global Configuration Items”
8. Enable Systrack Direct Access – On Master and Regional Server
1. In SysTrack Deploy, select Configuration – Global Configuration Items from the menu bar.
2. Select the Tree Settings tab.
3. Select Connect Using – System Name as shown below, and click the OK button.

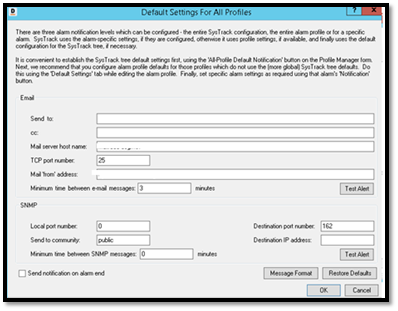
9. Click on Configuration Menu and select “Default Notification Settings”

10. Define Default notification settings
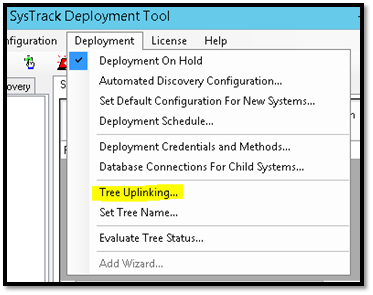
2.7 Build the Provisioning Server – Configure Tree Uplink And Deployment Credentials
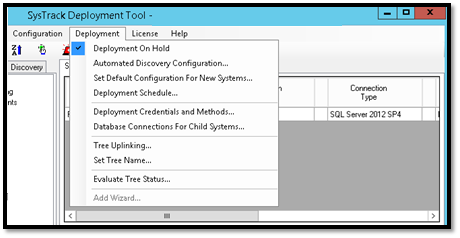
- On Master Server: Click on Deployment Menu and Select Tree Uplinking…

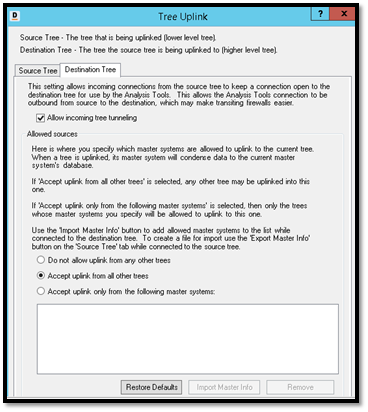
2. On Master Server
Select “Allow incoming tree tunneling” and “Accept uplink from all other trees” options as shown in screen shot
Note:
Source Tree: The tree that is being uplinked (Lower level tree)
Destination Tree: The tree that source tree is being uplinked to (higher level tree)
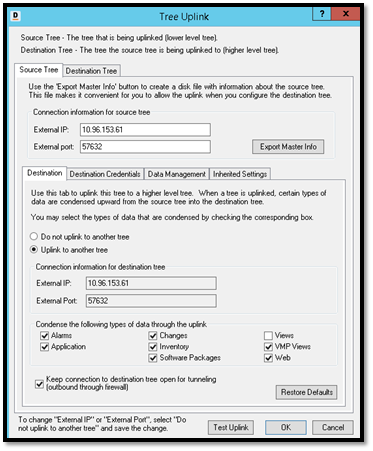
3. On Regional Server
Click on Deployment Menu and Select Tree Uplinking…
- On Regional Server: Apply following settings as shown in screenshot
External IP
External Port
Uplink another tree
Keep connection to destination tree open for tunneling (Outbound through firewall)
5. On Regional Server
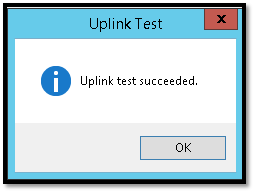
Click on Test Uplink and validate the status.
Click on OK and close the Tree Uplink Window
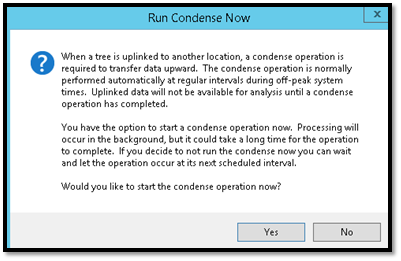
6. On Regional Server: It will ask to allow run condense now, Click on Yes
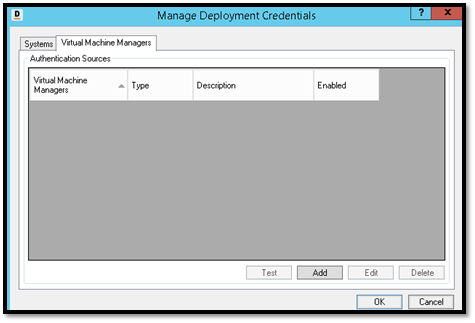
7. On Master and Regional Server: Click on Deployment Menu and select “Deployment Credentials and Methods”
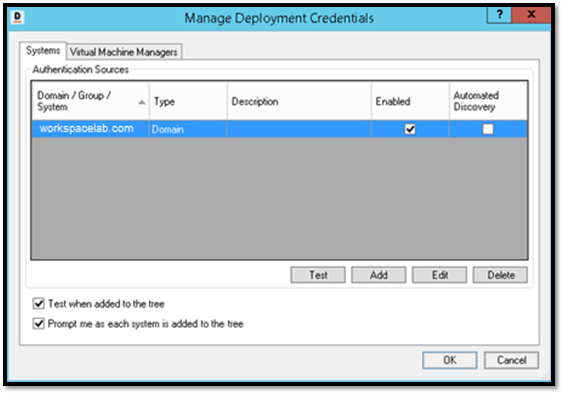
8. On Master and Regional Server: Click on Add button to supply credentials
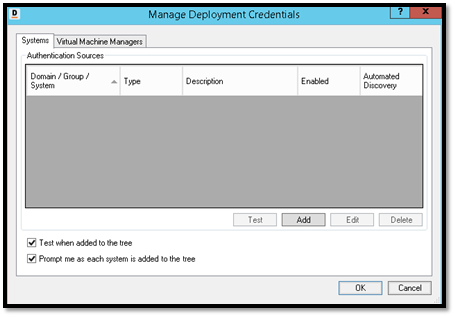
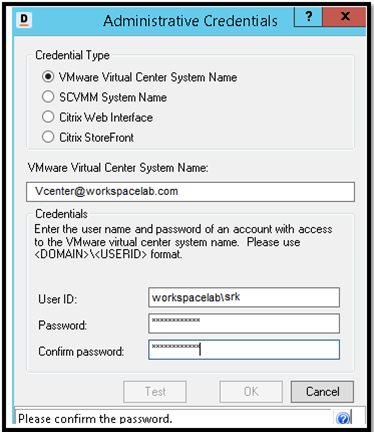
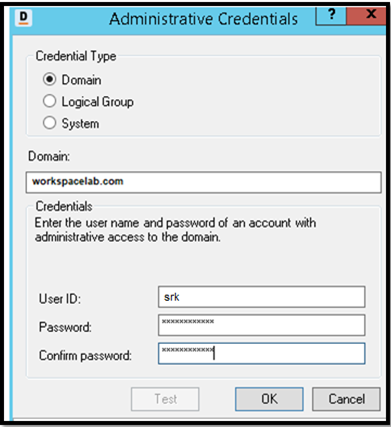
9. On Master and Regional Server: Supply credentials with Domain details and click on OK

10. On Master and Regional Server, Click on Virtual Machine Managers from Same window, Click on ADD to add ESXi Details
11. On Master and Regional Server Provide the vCenter Server name and Add each host details
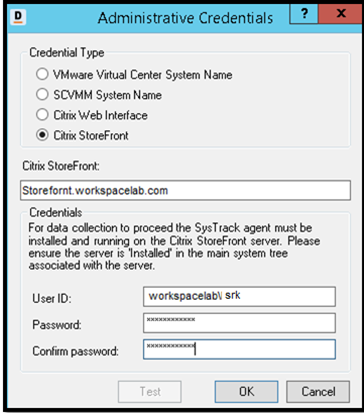
12. On Master and Regional Server Provide the Storefront name and click OK.
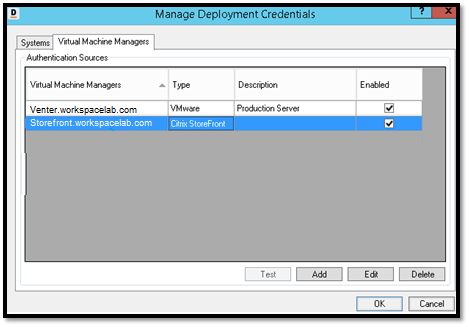
13. On Master and Regional Server, Click on OK to close the Manage Deployment Credential Window.
2.8 Systrack Agent Deployment – Pooled Model
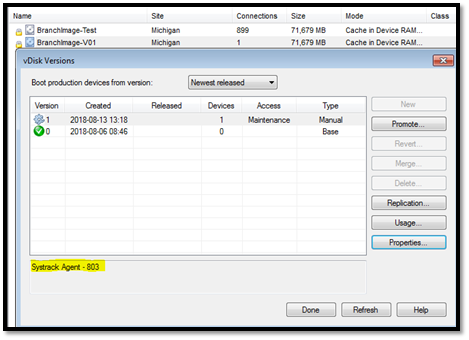
- Login into PVS Console and create the maintenance version on desired image. Reboot the Maintenance VM for the imaging with Systrack Agent.
- Copy the following files from Systrack Server and copy anywhere on the target device, Uninstall the current Systrack Agent (if any) from Add/Remove Program Window.
Source: C:\Program Files\SysTrack\InstallationPackages
Systems Management Agent_x32.msi
vcredist_x64_VC2017.exe
vcredist_x86_VC2017.exe
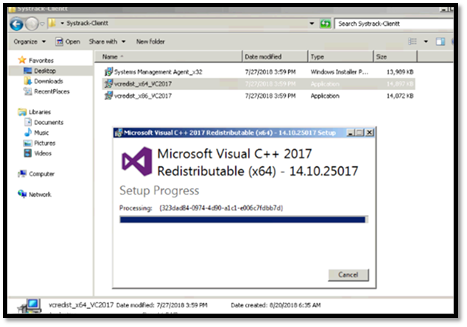
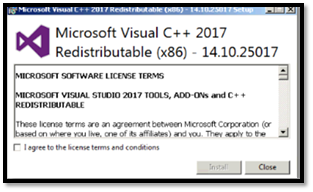
- Install below two plugins on target device
vcredist_x64_VC2017.exe
vcredist_x86_VC2017.exe
Accept EULA and click on Install for both plugins, it will ask for reboot; reboot and login back for agent installation.
4. Run the command to install the Systrack Agent.

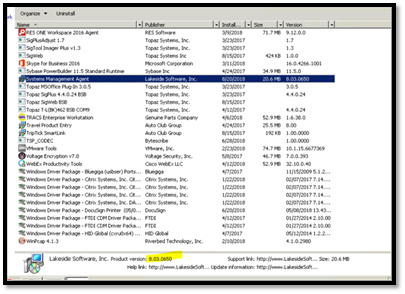
5. Verify the latest agent installed on the Target Device, 8.3.XX
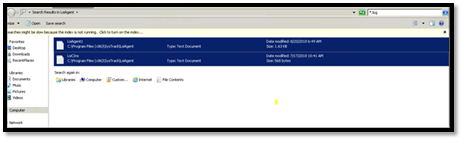
6. Delete the log files from C:\Program Files(x86)\Systrack\LSIAgent\*.log
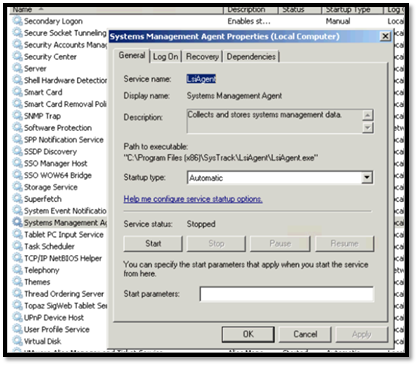
7. In order to make it PVS Golden Image Setup; Systrack Agent service has to be on stopped state. Before sealing the image; please make sure the “Systems Management Agent” is in stopped mode
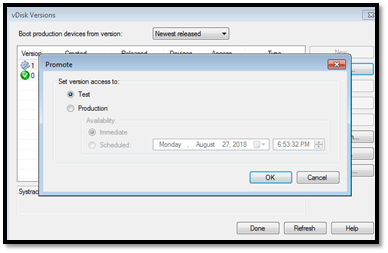
8. Shutdown the Target Device and promote image to Test or Production based on requirement. Reboot the desired systems to new version.
2.9 Virtual Infrastructure Integration
- Login into Regional Server and launch Deploy Tool
2. Open “Deployment” Menu and go to “Deployment Model Credentials and Methods”
3. Under “Systems” tab; click on Add to update “Administrative Credentials” and Validate by click in on test.
4. Enter shown Virtual Machine Managers credentials and validate by clicking on test button. Click on OK once validated.
